- Beiträge
- 4.089
Install the app
How to install the app on iOS
Follow along with the video below to see how to install our site as a web app on your home screen.

Anmerkung: This feature currently requires accessing the site using the built-in Safari browser.
Du verwendest einen veralteten Browser. Es ist möglich, dass diese oder andere Websites nicht korrekt angezeigt werden.
Du solltest ein Upgrade durchführen oder einen alternativen Browser verwenden.
Du solltest ein Upgrade durchführen oder einen alternativen Browser verwenden.
Agilo velomobile
- Ersteller anotherkiwi
- Erstellt am
- Beiträge
- 4.089
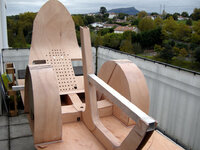
Of course when I say "chassis" it is just shorthand for the assembly of parts that will receive the sides and roof - Agilo is of course a monocoque with the skin playing a structural role.
- Beiträge
- 4.089
I am pre-bending the skin panels:
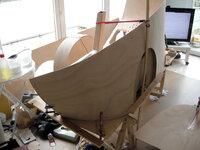
The bend is quite easy, it just requires a lot of strength. Once you understand where the wood wants to go you can explain where you need it to go with some gentle persuasion techniques.
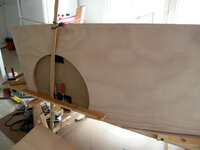
My biggest problem at this stage was getting the wood wet enough, the panels are too big to go in my shower...

The bend is quite easy, it just requires a lot of strength. Once you understand where the wood wants to go you can explain where you need it to go with some gentle persuasion techniques.

My biggest problem at this stage was getting the wood wet enough, the panels are too big to go in my shower...
- Beiträge
- 4.089
There are two prototypes:
- the one from the 2017 Spezi, he still drives it from time to time he told me
- the current one you see photos of on his web site, but I don't know what state it is in today
He told me he changed the position of the front pilar which holds the boom because it wasn't practical in daily use, otherwise the inner structure remains much the same. The new body shape is simpler and easier to build. I like the entry of the 2017 one better.
So yes there is (at least) one drive-able Agilo. I chose to build it because I saw that Spezi version in photos "on the road". The hardware comes from other vélomobiles so has been tried and tested for years.
- Beiträge
- 4.089
- Beiträge
- 4.089
That is just the bending, wait till you see it glued together 
- Beiträge
- 1.029
Awesome !
I'd really like to touch it.
I'd really like to touch it.
- Beiträge
- 4.089
Awesome !
I'd really like to touch it.
I really wish it had a flip up entry like yours! But it will be white and green
- Beiträge
- 9.654
Denk dran den Kofferraum etwas größer zu bauen, bis Germersheim sind es ~1300km und wehe du kommst nicht zur Spezi ....I really wish it had a flip up entry like yours!
Gruß Jörg
- Beiträge
- 1.029
5 metre paint or 1 metre paint ?I really wish it had a flip up entry like yours! But it will be white and green
- Beiträge
- 4.089
Remember to build the trunk a little bigger, to Germersheim it's ~ 1300km and woe betide you don't come to the Spezi ....

That was my goal but if I am only on the road in March there won't be enough time - I want to have done at least 1000 km road testing before setting out on such a long adventure. I am still looking for a solution to get the parts I need from velomobiel.nl so that I can finish building quicker...
There is enough room for everything, it is huge inside.
- Beiträge
- 4.089
5 meter painted or 1 meter painted?
If I paint myself then definitely 5 meter but there is a car paint shop guy someone knows on the other side of the Basque Country who isn't very expensive... We shall see.
- Beiträge
- 4.089
- Beiträge
- 4.089
Tomorrow igus deliver the bearings for the rear swing arm. Once they are mounted I will be able to glue on the body panels so there should be more pretty pictures here soon.
- Beiträge
- 4.089
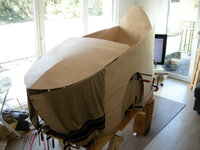
The sides are "on", tack glued in place. Side one was easy, side two not so easy. I think more towels and hot water will convince it to take up position...
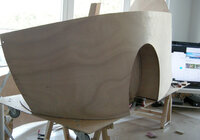
Yes the wood has lots of horrible ripples. No I will not be using filler to remove them, it is wood not plastic, I can live with ripples.
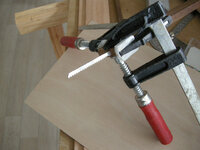
What do you do when you don't have a jigsaw and you need one in a hurry? You make one! This is a piece of pure kiwi engineering!


Yes the wood has lots of horrible ripples. No I will not be using filler to remove them, it is wood not plastic, I can live with ripples.
What do you do when you don't have a jigsaw and you need one in a hurry? You make one! This is a piece of pure kiwi engineering!

- Beiträge
- 4.089
- Beiträge
- 4.089
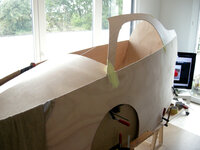
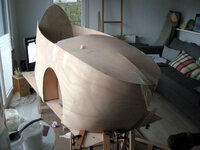
If I remember correctly (IIRC) I promised a finished Agilo body for the end of October. Well unforeseen circumstances, procrastination and the weather (!) have prevented that from happening, but it is very close. There are 6 pieces of wood left to be glued on to have a body with roof. And another 3 pieces of wood plus lots of little strips to glue on before and after the door is cut.
Procrastination:
- fixing the motor controller to the boom, but where?
- building a box in the the nose to house the light, a horn and the bell, with an air intake with flow directed over the controller
- which side do I mount the holder for the rear damper lockout button
- size, shape and number of foot holes to cut
- ...
I am locked up at home for 4 more weeks, I have all the epoxy and wood and whatever I need to continue working. No more excuses!
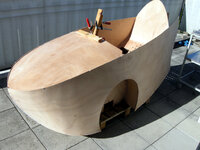
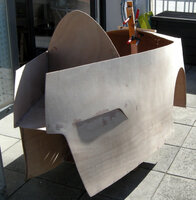
The wide angle lens and the close distance photos make the body look chubby. Agilo is a short velomobile but it is much sleeker looking in real life. I have removed the body from the building plate earlier than in the normal building sequence with the authorisation of the designer. This is specific to my Agilo build.
Procrastination:
- fixing the motor controller to the boom, but where?
- building a box in the the nose to house the light, a horn and the bell, with an air intake with flow directed over the controller
- which side do I mount the holder for the rear damper lockout button
- size, shape and number of foot holes to cut
- ...
I am locked up at home for 4 more weeks, I have all the epoxy and wood and whatever I need to continue working. No more excuses!


The wide angle lens and the close distance photos make the body look chubby. Agilo is a short velomobile but it is much sleeker looking in real life. I have removed the body from the building plate earlier than in the normal building sequence with the authorisation of the designer. This is specific to my Agilo build.

