Agilo velomobile

But wait - i remember somethin in Marc's blog:

milan-strut-with-brake-cable-adjuster.jpg
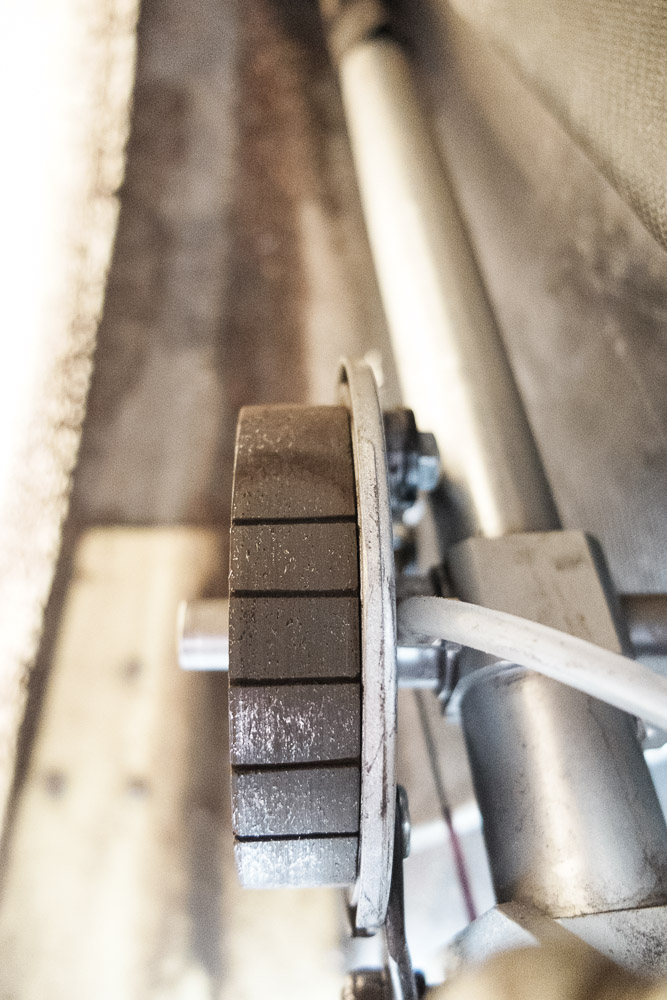
Thats my old set-up of the left hand strut*. While this is the standard brake plate set-up of velomobiles (black brake lever to the rear), the excenter shaft of brake plates is actually the wrong way around in this case and actuates the brake pads with the "wrong" side of the excenter. That leads to inferior brake performance.

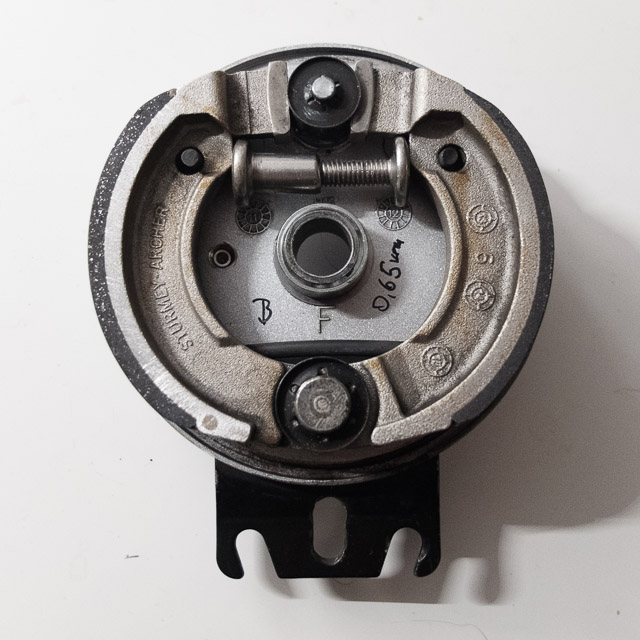
Easily solved by turning the brake lever by 180°, loose the nut, take off the brake lever and install it shifted by 180° again.

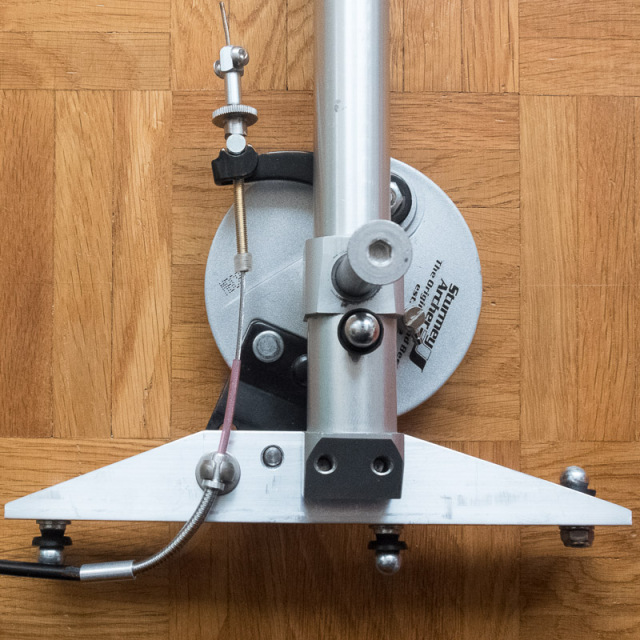
My current brake plate set-up is fairly similar, but the brake plates are the same way as in every trike. Brake lever to the front (no its a pain to reach the adjustment nut, though :rolleyes: :ROFLMAO:).


*the front rod end ball (on the right) is supposed to go to the underside as well, though
 
Brakes are probably more important where I live that going fast on the plain, I have learnt that over the months that I have spent here with you all.
If you cut two or three notches diagonally into the brake pads, braking performance will increases noticeably and since the brake pad grid/dust (however its called) will go into the notches, it keeps the brake pads clean and prevents glassed-over brake pads for quite a while. Win-win!

I used a metal saw to cut the notches*. About 1.5mm deep. Here is an example from my Milan, but with waaay too many notches that leads to kind of "digital" brake feel ON and off. ;)

milan_nuten-in-bremsbelacc88gen.jpg


*Finde a M6 screw with a nut at the end, that fits between the brake pads and blocks them if you turn the brake lever to 90°. Take brake lever off, take excenter shaft out, swivel brake pads to the side and cut the notches.
 
As promised my solution to attaching the brake cable.

brake-outside.jpg

1. A (tiny) washer and a short section of 8 mm aluminium tube with a 2.5 mm hole drilled through

2. the standard SA tensioning assembly which does offer about 15 mm of tension before reaching the steering plate

3. the barrel nut

and inside:

brake-inside.jpg

The unfamiliar (for some of you) aluminium box is the HWBS (Hidden Wire Brake Sensor) for turning off the motor when you hit the brakes. It is so sensitive that you can use it for turning off the motor when changing gears just by touching the brake lever at the same time. I hope that the signal activates the brake light too but I don't remember if it is the correct version... The advantage of linked brakes compared to separate ones on tank steering is that you only need one HWBS. I will be installing a rear parking brake after testing the one supplied... :censored: Or maybe just a band of Velcro holding the brake lever when parked, something that works... :rolleyes:

Yes I did destroy the brake cable when tightening and un-tightening the barrel nut during my various experiments, that is the replacement brake cable.
 
The unfamiliar (for some of you) aluminium box is the HWBS (Hidden Wire Brake Sensor) for turning off the motor when you hit the brakes. It is so sensitive that you can use it for turning off the motor when changing gears just by touching the brake lever at the same time.
Nach meiner eigenen Erfahrung wird Ihr HWBS nicht funktionieren, da es den Motor ständig unterbrichen wird. Im Inneren des HWBS befindet sich ein Gleitelement mit einem kleinen Magneten, der am Kabel klebt, aber auch darauf gleiten kann. So montiert, wie Sie es gemacht haben, kommt der Magnet nicht mehr in seine ursprüngliche Position zurück, um den Kontakt zu öffnen. Er sollte in umgekehrter Richtung, also an der Trommel, montiert werden. Ich habe mich stattdessen für Bremshebel mit integrierten Schaltern entschieden.
 
Zuletzt bearbeitet:
It was mounted that way on the upright pedelec just above the Avid rear brake so I think the pulling direction is correct. Like everything Chinese there are always different versions. A quick test will tell us who is right, watch this space :giggle:
 
Wenn ich wetten müsste, würde ich auf @Samural setzen ;)

Gruß Jörg

Edit:
Die erste Zeit wird es aber funktionieren.

You are both correct, I found a photo of the upright and even though the red light is on the top it is pointing to the brake, not away from it... :whistle:

Lucky me, it is on the brake cable I have to change anyway. :giggle:
 
Bei Ihrem Pedelec war er zwischen der Kabelhülle und dem Bremssattel montiert, so dass die Kabelbewegung in die umgekehrte Richtung ging, denn bei Ihrem Velomobil ist er zwischen dem Hebel und der Kabelhülle montiert.
2021-03-26 12_06_10-Window.png
 

Anhänge

  • 2021-03-26 12_04_04-Window.png
    2021-03-26 12_04_04-Window.png
    38 KB · Aufrufe: 7
Wenn die bremsen mal einige 10.000 km hinter sich haben, ist es nicht unwahrscheinlich das die achse vom schwarzen bremshebelteil nicht so flot mehr geht. Dann bewegt das amchen langsamer zuruck als das bremsseil und dessen halterung. Dann kann in theorie das querrohr aus seine halterung im armchen fallen.

zwei dunne tiewraps im kreuz druber sind eine lösung.

Grusse, Jeroen

Yes even the Alligt plastic part uses cable ties. I will do that too but I don't have any thin ones in stock at the moment, that is why they are not on the photo.
 
Muss man dazu die Bremsbacken abmontieren, oder ginge "Dremeln" mit kleinster Fräse?
Es reicht die Excenterwelle auszubauen. Dann lassen sich die Bremsbacken seitlich verschieben und du kannst auch die Excenterwelle frisch schmieren. Beim nächsten mal werd ich (wenn irgendwann neue Bremsplatten ins VM kommen) die Schlitze im 45° Winkel sägen. Dann sollte die Bremse etwas "weicher" greifen und (Laufrad-Richtung beachten!) den Bremsstaub selbsttätig Richtung Bremsplatte befördern.

Der Trick die Excenterwelle auszubauen ohne sich an den Bremsbacken die Finger zu brechen, ist 1. Bremshebel auf 90° drehen und 2. die Bremsbacken mit ner M6 Schraube und (Lang-)Mutter zu blockieren. Sonst wird vor allem die Montage der Excenterwelle gegen die Federkraft der Rückstellfeder ein echter Krampf! BTDT
bremsplatte-mit-spreizschraube.jpg


Alternativ kannst du die Schlitze mit nem 1,5mm Kugelkopf-Fräser in die Bremsbacken dremeln. Mit nem Scheibenfräser oder Trennscheibe sägst du dir allerdings (wenn du die Excenterwelle nicht demontierst) Schlitze in Aluplatte.
 
Zuletzt bearbeitet:
I thought about that (smaller holes, though), but apart from providing some space to take off the brake dust, the edges of the nodges are the main reason why the nodges increase braking performance, I think.
 
I hope to be leaving here on the 11th - 7 x 182 km drive. If I am vaccinated. If I am fit and healthy...
- 6 h 45 min driving time per day at 27 km/h average speed (my average on the assisted trike)

No sir, the assisted trike will not be allowed. ;)
If the SPEZI will occur and you are vaccinated and fit, then we expect you to come with AGILO, nothing else ...
No pressure, just kidding :unsure:
 
My computer has no network so I am quiet. Work continues despite another lockdown. Tomorrow I will receive the polycarbonate for the windows.
 
From my end there is!
Well, consider for yourself why I add the ":unsure:" next to the line ...
Do not pretent to be a fool, Chirs*Itotalagreewithyou*toph. Of course, we want to see, touch, smell and test-ride the Agilo! And if the Agilo will not be present, but well the owner, I will do with @anotherkiwi what I will do with other kiwis ... slice them into slices and eat them raw
;)
 
Emojis are no excuse for unclear statements. :cool:For the rest, I completely agree with you:
kiwi zanni.jpg
 
Zurück
Oben Unten